The BDU Commander orders are to depart port and proceed to grid reference AN16 to patrol for 24 hours. The cash in this game is renown, and you gain it for following orders and sinking vessels. When it comes right down to it, everything is a matter of tonnage in the end. When you are down to one fish left to fire, aim for the biggest ship that can be brought down with one torpedo.
The U-2 departs the pen while spectators and a band loiter on the docks.
I plot a course for AN16 just off of Scapa Flow knowing full
well war with England will break out before I arrive and all of those ports
colored green will turn red (designating enemy installations).
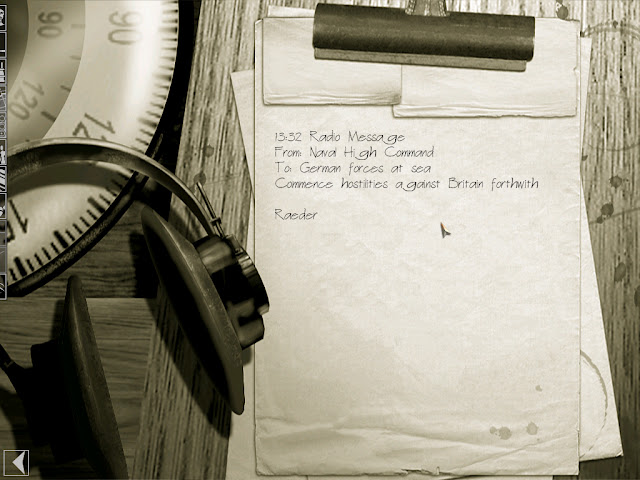
Erich Raeder issues the boilerplate order: from this point
forward much of what occurs in the game is up to me and the AI, as the dynamic
campaign is one of the best in video gaming and never, ever plays out the same
way twice.
My first target of opportunity also became my first kill. A
1,960 (estimated) ton Coastal Merchant is spotted off of my starboard bow and I
launch a TI (G7a) gas/steam torpedoes set at a 5 m running depth with a
magnetic pistol (quite risky with these pre-war issued relics).
The fireball on the horizon ends the lives of countless avatars.
The orange ring in the water closer to the status bar is the position of my
ship, at periscope depth.
I reach the patrol grid to achieve the first objective and then go to periscope depth to begin running the grid search laid out by the navigation officer.
Running underwater uses up the batteries quite fast, so it
is a dance between running on top to recharge and risk being spotted and
running below to avoid detection.
Another coasty is spotted and this time I let him get in
close (within 2,000 m) to launch a single fish on an impact pistol aimed right
for his smoke stack.
One of the shortcomings of the early pre-war issued
gas/steam torpedoes: they leave a visible trail of bubbles on the surface
(drawing a line right back to my sub as well).
The map is updated with a simple yet telling icon: a broken vessel
sinking below a waterline.
With both objectives complete, I am free to roam around for
additional targets or head back to port (all depending on weather, fuel and
most importantly – contact with the enemy).
I decide to head for home and come across a Small Merchant
estimated at 3,700 m distance.
I set the torpedo up to run at a depth of 3 m with an impact
pistol, on fast speed.
Splash one Small Merchant vessel for 2,334 tons.
I hope the crew showered as this is going to be a long trip
home.
Along the way another coasty ventures across my path.
Turning in a futile effort, the merchant cannot avoid the
fish in the water.
I normally run on top ahead standard at night during early
war periods, but this trip had an enemy tug boat harassing me for a good part
of the journey home.
A grid and a half from home port, I receive a warning from
the engineering officer that the diesel fuel reserves are down to 10%, so I
have to creep into the docks.
At this point I am about to order my men to swim for it.
Home sweet home!
After-action Reports
Four allied ships sunk for 8,430 tons and all crew returning
home healthy.
The patrol ended September 11th and I picked up
687.75 renown points which I can accumulate and spend on equipment upgrades and
even a new ship when they are issued to the Flotilla.
The Captains Log lists the engagement information for each
successful attack.
I am not operating in a vacuum here as there are other
submarines prosecuting targets in the dynamic, unscripted campaign I am undertaking.
Post Mortem
For this career, the realism settings are at 54% with the following assists enabled: no manual targeting system, map contact update, external view, stabilize view and weapons officer assistance.
This after-action report of a new career started in Silent Hunter III is actually being written approximately three months after the actual mission was played. It was around this time that I became very ill and ended up in the hospital, ultimately requiring surgery. A good many things went by the way side during that time, but I did manage to have these screen shots in the Fraps folder.
The career file is still active in the game so I plan on continuing this effort, possibly once a month. This iteration is being played through Steam on my Windows 7 gaming rig, and unfortunately the Steam overlay is not supported in the game so screen captures have to occur using third-party software (as mentioned, in this case that being Fraps).


No comments:
Post a Comment
Note: Only a member of this blog may post a comment.