

When FSX came out in 2006, I passed on it as well due largely in part to its steep system requirements and multitude of complaints from the community surrounding poor optimization and bugs. However when Steam released an updated version of the game in December 2014 placing it immediately on sale at $4.99, I simply could not resist giving it a chance. Although there are numerous issues with the game, it does work in a Windows 7 environment and I feel that it is a great value at that price point.
One thing I struggled with immensely at first is successfully navigating an IFR flight plan, approach and landing. There are literally hundreds of videos on YouTube which are of various quality and length; however each one seemed to either leave out some specific step of the process and/or oversimplify the presentation. While I found some of these videos helpful, the best resource I came across in my search for assistance was this forum post from almost ten years ago which spells it out in detail.
That single post helped me far and away (pun intended) more than any single video I have seen to date.
My post below is not really an after-action report of a flight, but more my own version of a guide from take-off to landing for future reference.
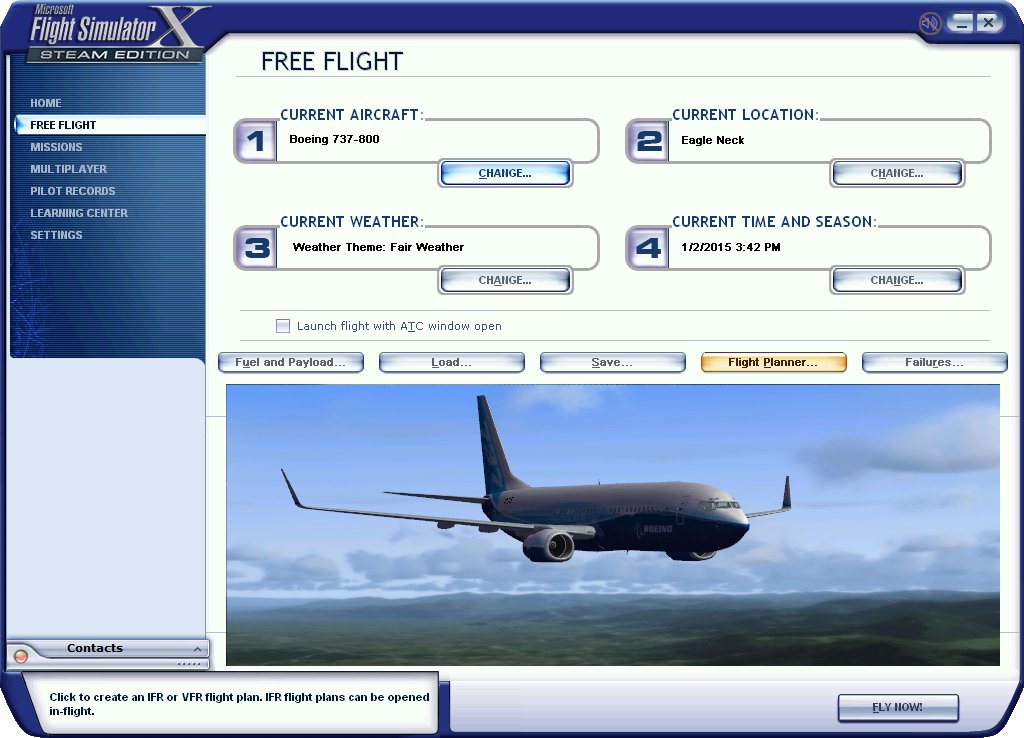
The first thing is to select the aircraft that you want to
fly (here I am using the stock Boeing 737-800) and then select Flight Planner.
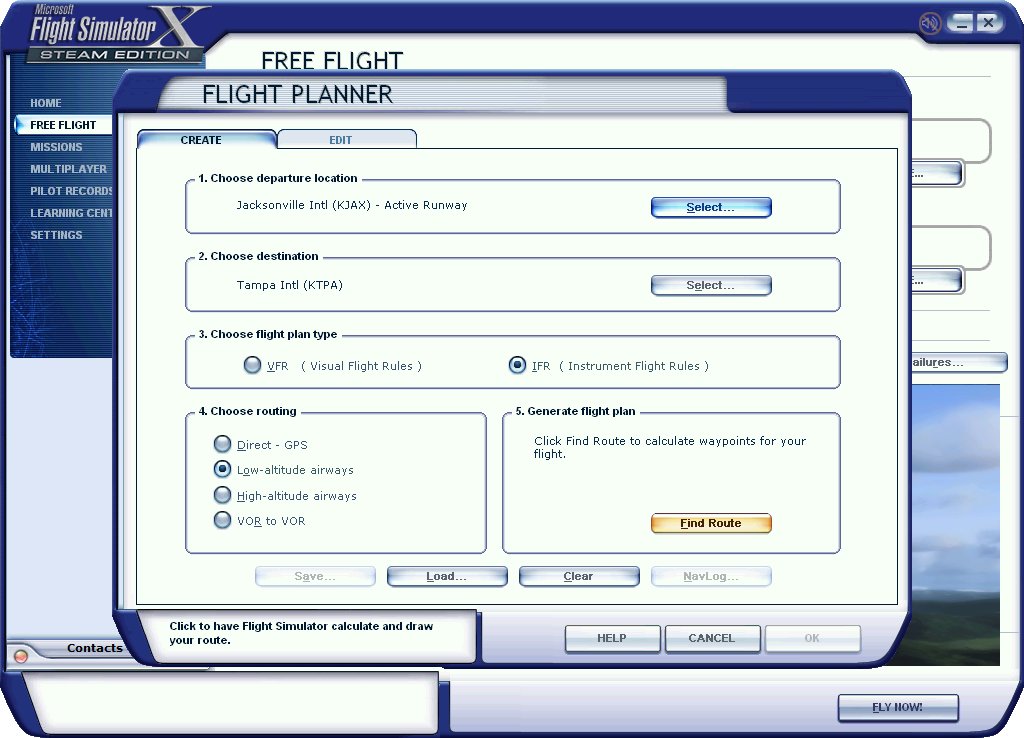
The next step is to select the departure and destination locations;
in this case I selected Jacksonville International (KJAX) and Tampa
International (KTPS). I also selected the IFR (Instrument Flight Rules) and
Low-altitude airways radio buttons, and then selected Find Route.

The game will load a basic flight plan based on the selections previously input. Here several changes can be made such as adding and deleting waypoints as well as altitude adjustments, however I am leaving everything as is. The next step is to save the flight plan with the default naming convention suggested, in my case “IFR Jacksonville Intl to Tampa Intl”.
Once that is done, select OK and you should receive a pop-up message asking if you want to move your aircraft to the departure airport (answer yes).
When all of that has been completed select the Fly Now
button and the game should load.
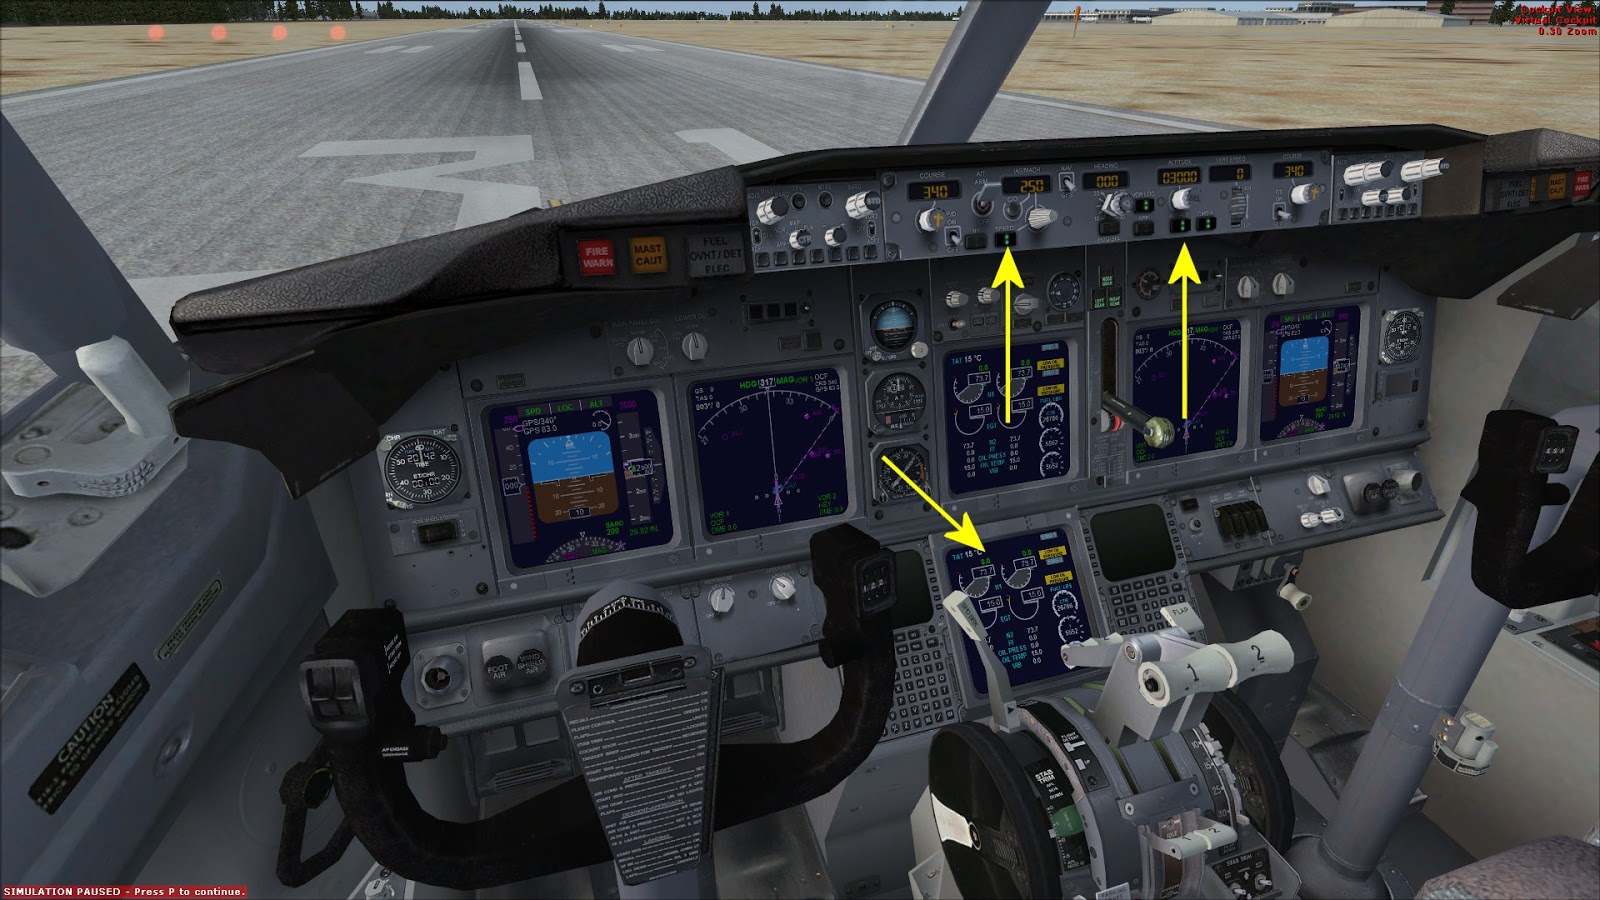
As soon as the game loads with the aircraft (probably on the runway) immediately pause the game and check to make sure you are not carrying over settings from another session. There is currently a bug in the game that when a new plane and/or flight plan is loaded (even from a fresh instance of the game running), the system will somehow remember previous settings and you may start out going into full throttle.
In the screenshot above I am beginning with AP (autopilot), SPEED (auto-throttle), VOR LOC (navigation hold) along with APP (approach hold) all engaged. If I went with this setup the plane would crash off to one side of the runway as in most instances the ailerons are up on one side and down on the other.
If someone knows of a fix for this, I would appreciate some feedback.
While paused, turn off all of these settings and reduce the throttle to idle so that the plane is sitting still on the runway.

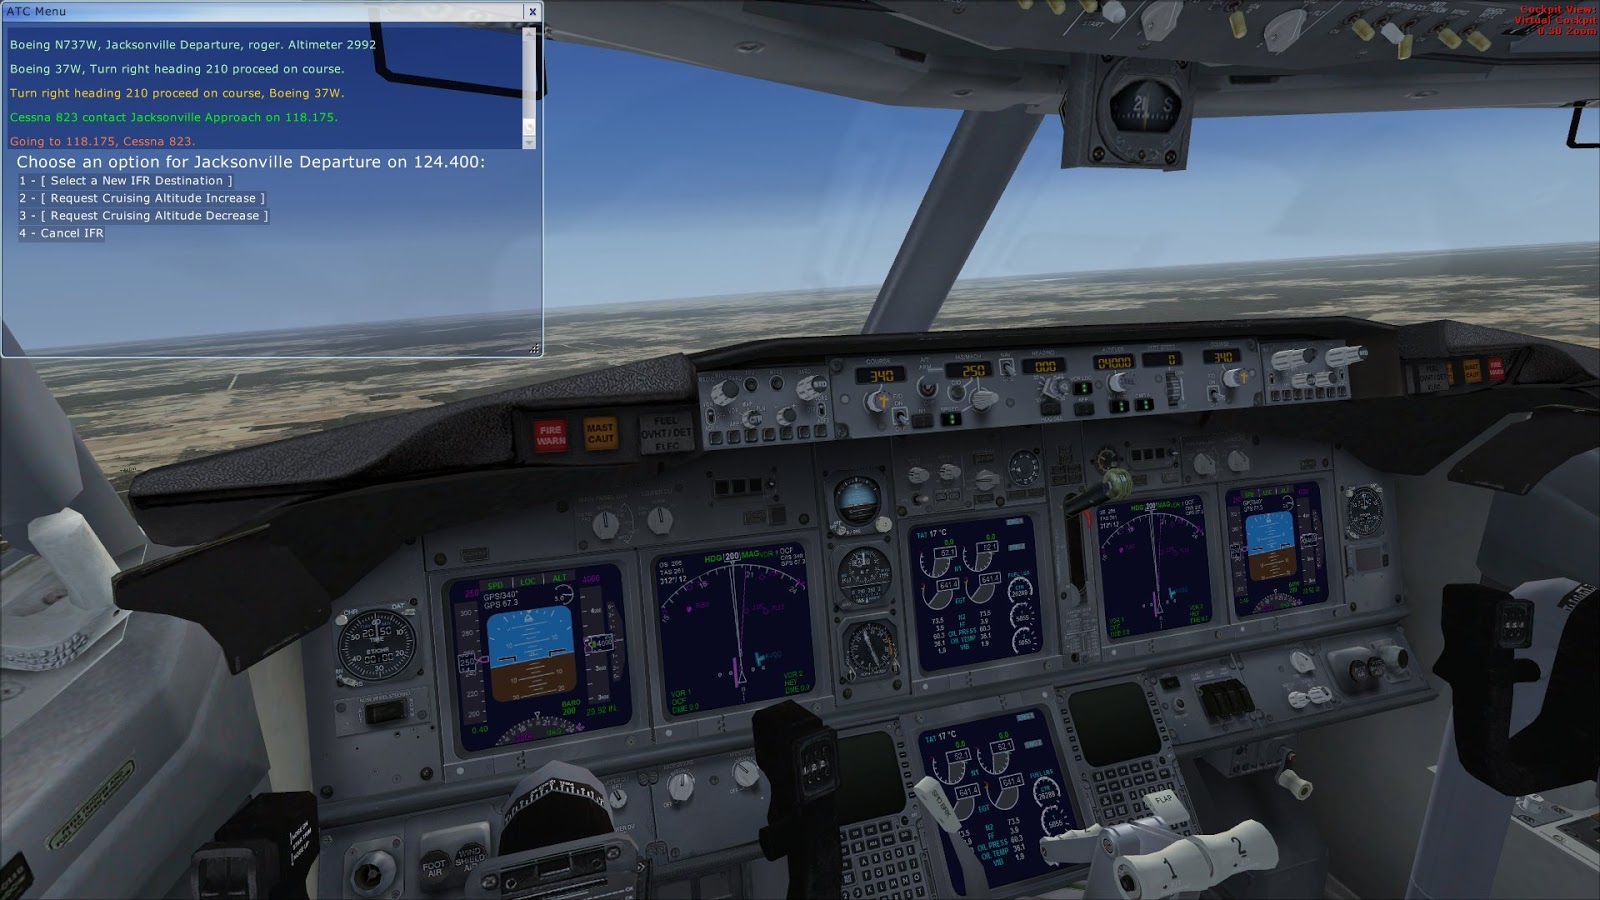
Once the aircraft is settled down, I bring up the ATC Menu and
go through the whole process to obtain clearance for take-off. At this point I
changed my altitude setting for the autopilot to 4,000 (but will not engage that until I am safely off of the ground and above 1,000 feet and climbing).
My process for launching this bird is as follows:
- Airbrake set to RTO
- Flaps set to 5 (F7 X 3)
- Throttle increased to 100% (F3, but F4 can be used to go to full throttle if you prefer)
- Visually check to make sure that the SPEED (auto-throttle) is set to 250 KIAS (maximum Knots-Indicated Air Speed for under 10,000 feet cruising altitude) and is in the off position (not lit)
- Visually check to make sure that the NAV/GPS toggle switch is set to GPS
I hold the parking brake in until the engines are spooled up and then release them. At an airspeed of 160 KIAS I pull the stick back to achieve a climb rate of 10-15 degrees until I clear the runway.

Once I am off of the tarmac I raise the landing gear while trying to maintain a climb rate of 10-15 degrees. Here I am using the flat panel display (the A button on the keyboard) as some of the buttons and dials are easier to work here then while using the Virtual Cockpit.
My next sequences of steps are as follows:
- Set the airbrake to off
- Fully retract the flaps (F5)
- Select CMD A (autopilot, Z button on the keyboard)
- Select ALT HLD
- Select VOR LOC
- Verify that the A/T ARM switch is up and then select SPEED
Somewhere during this process the tower should contact you.

If you miss the ATC message don’t sweat it as they will
repeat it. At this point if everything has been done properly your aircraft
should be banking towards the first waypoint of the programmed route. This could literally be the last time you touch the stick and manually control the aircraft until you are flaring the nose while touching down on the runway.

Almost immediately ATC issues a turn instruction, however I
have a route programmed and it is too early to break from that so I decide to
initially ignore this command and see how my GPS and VOR LOC autopilot
functions align me. If ATC comes back and asks me to expedite, it means that
the programmed route is no longer the desired route and I will make a decision
at that point.

Here a few moments later I have the GPS up (and resized) as
well and the Multi-Function Display expanded which shows my aircraft moving
to intercept the route plan (the pink line in the center of the display). I
am handed off to another radio contact with no complaints so far.
I shortly thereafter receive another turn instruction which
I acknowledge and initially ignore as the programmed route so far seems to have
synergy with what ATC wants me to do.

While settling in on the first leg of the assigned route, I
bring up the kneeboard to verify the specified altitude of 4,000 feet. This may
seem redundant to some as I am also receiving “live” instruction from an active
and somewhat realistic ATC module, however I like checking it nonetheless.
While heading from KJAX to OCF (approximately 55 miles away)
I engage 4X simulation speed slowing down to acknowledge and proceed with
several hand-offs to other ATC entities.

Here I arrive at VOR location OCF and the plane banks towards
waypoint LIMMO. At this point I am approximately in the middle of the state of
Florida.

While heading in a direct line to the waypoint LIMMO I
receive an instruction from ATC to turn left heading 185 and to expect vectors.
At this point I break from the planned route and enter the heading of 185 on
the Heading dial, then select the HDG SEL button directly below it which automatically disengages VOR LOC.

Having never flown to Tampa before, I pause the game to enter the map, locate the airport and zoom in to locate the runway 36R, and then click on it to bring up some additional panels that give me the localizer frequency setting and runway course heading.
This is one area where the game kind of falls down in that you cannot access the map without pausing the game: I find this kind of negates the immersion and it would be better if they could integrate the map into the actual game play session.

The next thing that needs to be done is to open the radio
stack and input the ILS frequency into the NAV 1 section of the panel. This is
accomplished by first entering it on the right side dial, then toggling the
switch to set it to the active channel. Then select the NAV 1 button at the
bottom of the radio stack so that an audible Morse code will be heard. The
final thing to do here is to set the heading of 4 into the Course dial (and do
absolutely nothing else).

At this point in the flight I begin to hear the Morse code identification
signal of the localizer. Note on the Multi-Function Display how far off I am
running a heading of 185 compared to the GPS flight plan that was loaded (not
too much actually, I have had far greater route adjustments ordered by ATC).
At this point I open the radio stack again and press the white NAV 1 button at the bottom to turn off the annoying racket.
At this point I open the radio stack again and press the white NAV 1 button at the bottom to turn off the annoying racket.
:)

Here I receive instructions to turn right heading 250, and
at this point I take the opportunity to back my airspeed down from 250 KIAS to
195 KIAS.

Additional turn instructions are received and followed:
these are not meant to align you perfectly to a runway, but to orientate you to
intercept the glide slope so that the approach hold auto-pilot functionality
can be properly employed.

A look at the map reveals the different approaches: the
route at the top left is the original GPS flight plan (the white and pink
lines), and the route at the bottom right is the result of following several
turn instructions from ATC, with the intention to bring me into a proper
approach pattern.

Beautiful Tampa Bay: Cockroach Bay Aquatic Preserve (no
kidding) in front of me and St. Petersburg across the water. I will need to be
banking right here soon to make Tampa International.

See, I wasn’t kidding about Cockroach Bay.

There are a number of things going on here in this screen
shot: I tune to Tampa Approach and am ordered to turn heading 310, then almost
immediately to 340, and very shortly after that to descend to 2,000 feet. I
also take this opportunity to back the airspeed down to 185 KIAS.

This is just another great shot of Tampa Bay, this time at an altitude of 2,000 feet.
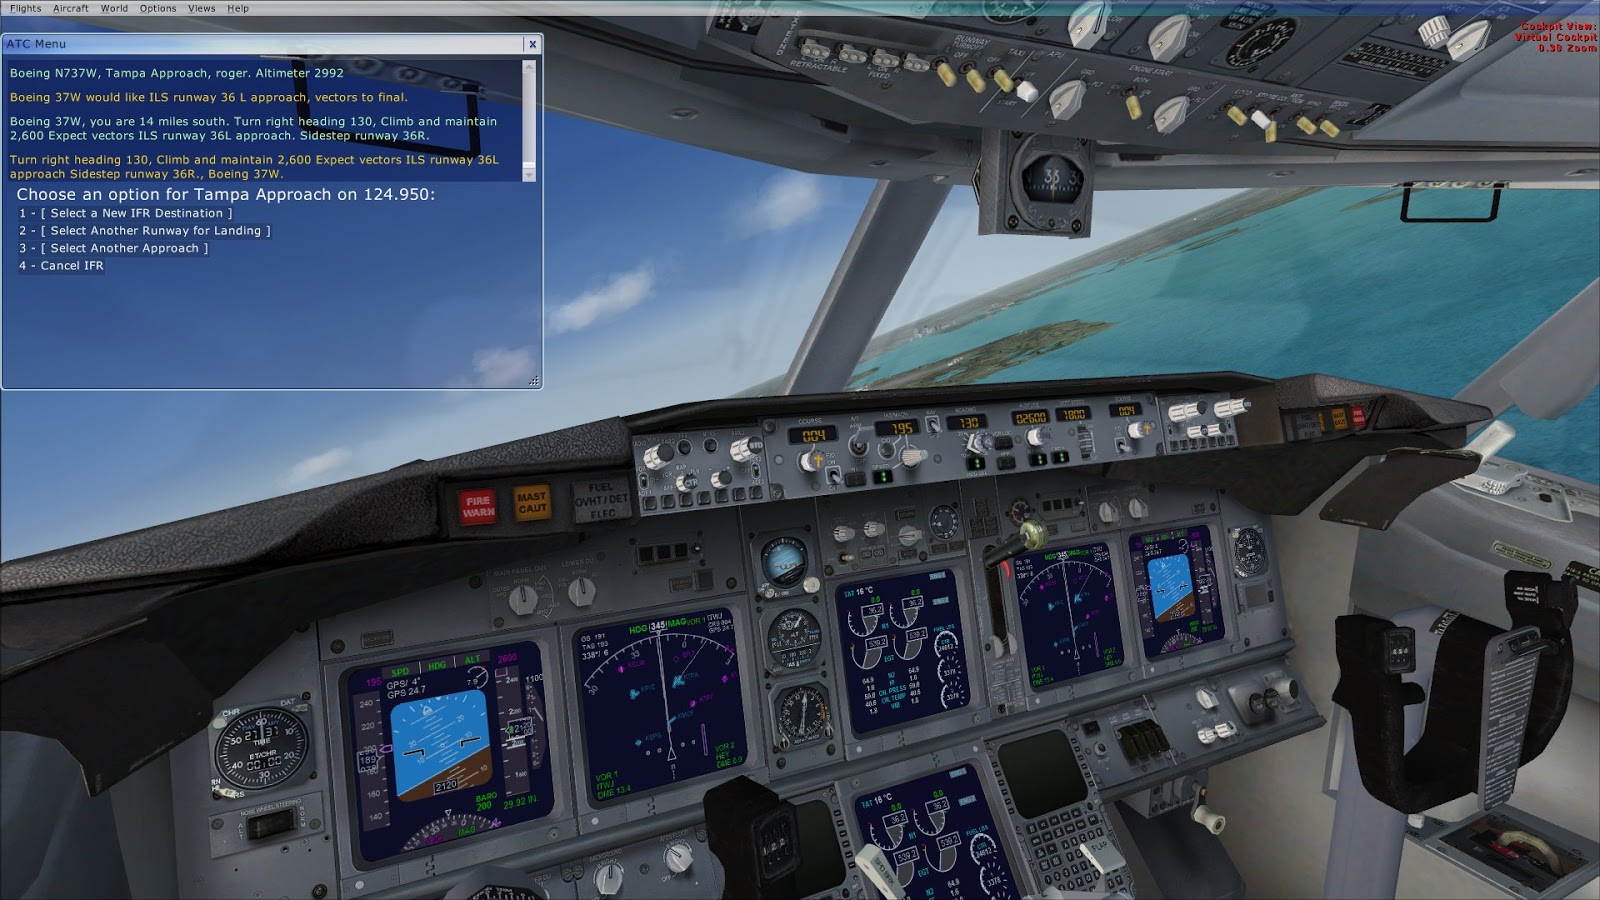
It is at this point that I chicken out of the visual approach in what is looking like a tight turn and descent to the runway. Using the ATC menu, I request a different approach, this time an ILS to the opposite runway 36L. ATC grants this change and I make the necessary adjustments to the radio stack and proceed to climb and turn out as instructed.
This is just another great shot of Tampa Bay, this time at an altitude of 2,000 feet.
It is at this point that I chicken out of the visual approach in what is looking like a tight turn and descent to the runway. Using the ATC menu, I request a different approach, this time an ILS to the opposite runway 36L. ATC grants this change and I make the necessary adjustments to the radio stack and proceed to climb and turn out as instructed.

Nothing much here other than another in a series of
significant turns that was ordered by ATC to bring me into an ILS approach on
the new runway.

This is an important step in that it signifies the final
turn towards the airstrip.

Once the order to "fly straight in" is given I immediately perform the following steps:
- Engage the Flight Director
- Turn the NAV/GPS toggle switch to NAV
- Select Approach Hold
- Airspeed set to 170 KIAS
This is the first part in a series of three steps required to take the plane from an auto approach profile to a manual landing (as this aircraft does not have any auto-landing capabilities).
There is a bug with the Flight Director switch animation in that once I change back to the Virtual Cockpit view, the switch appears in the down position (it takes a few viewpoint screen changes to be corrected).
Note that the ALT HLD indicator is still lit and the "Below
GS" indicator is lit as well. There are two pink diamonds on the Primary Flight
Display, one on the horizontal and one on the vertical. Once the glide slope
altitude is correct, the system will automatically disengage the ALT HLD.

This lines me up quite nicely to the runway that I hope to
land on.

At this point I begin the second part of the process:
- Set the Air Brake to 2
- Engage full flaps (F8)
- Lower the landing gear (G)
All other instruments are left alone here until just before I reach the runway.
Note that the vertical pink diamond in the Primary Flight Display is in the middle and the ALT HLD has automatically disengaged, allowing the aircraft to begin the descent to the runway.
For me once I receive clearance to land, that is pretty much
it. I have become aware of a potential bug in the game where there seems to be
a high number of “Go Around” instructions issued by ATC just before the aircraft
touches down on the runway, and if that occurs here I am going to ignore it.
Apparently this has been an issue since the game has been released back in
2006, and although the ATC is largely believable and helpful, this is simply an
annoyance that is overcome by several mods available (of which I am running
none – this is the stock game).

The ILS Approach System has done everything that it is
supposed to do to bring me to this point. As soon as the aircraft reaches the
end of the runway, I will disengage the autopilot (Z) and turn off the
auto-throttle, then set the engines at idle (F1).
Just before the plane touches
down I will pull back slightly on the stick to flare the nose, let the aircraft
settle to the runway then engage reverse thrusters (hold F2), then brake.
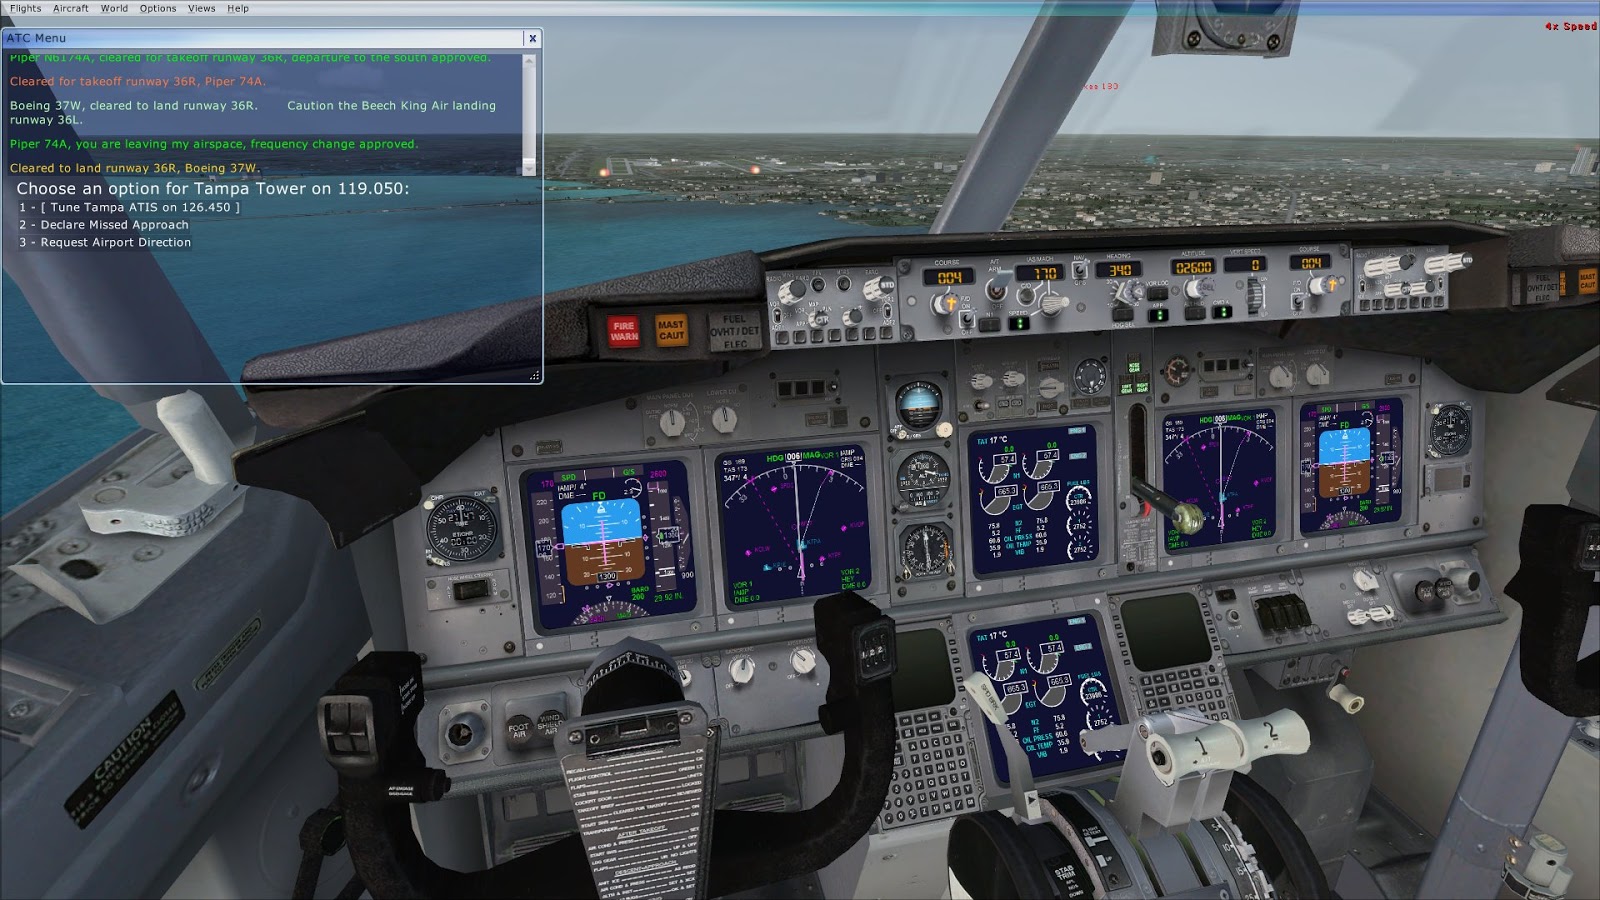
The absolutely hilarious thing here is that I landed on the
wrong runway (apparently I didn’t get what sidestep meant in the previous
instructions from ATC).

If all goes well you should be able to land and stop with
plenty of runway remaining. Typically I end the session here as I don’t go
through the taxi stuff (unless there are Steam based achievements sometime in
the future that would require this).

The post flight analysis provides various details of the
effort, and in this image shows the descent through the glide slope to the
landing at Tampa.

This is a summary of the messages that should have alerted me to what I perceive to be an abnormal situation: I requested an ILS approach to runway 36L which was granted, but completely failed in realizing that I was being directed to land on the opposite runway 36R.
This post offers some explanation as to what occurred, however I would have preferred a complete approach and landing instruction for the same runway.
In real life there is no telling how many people could have been killed.
No comments:
Post a Comment
Note: Only a member of this blog may post a comment.